Showing posts with label pinterest. Show all posts

Saturday, June 30, 2018

Traveling dragon Amugurumi-FREE pattern

1 comment:
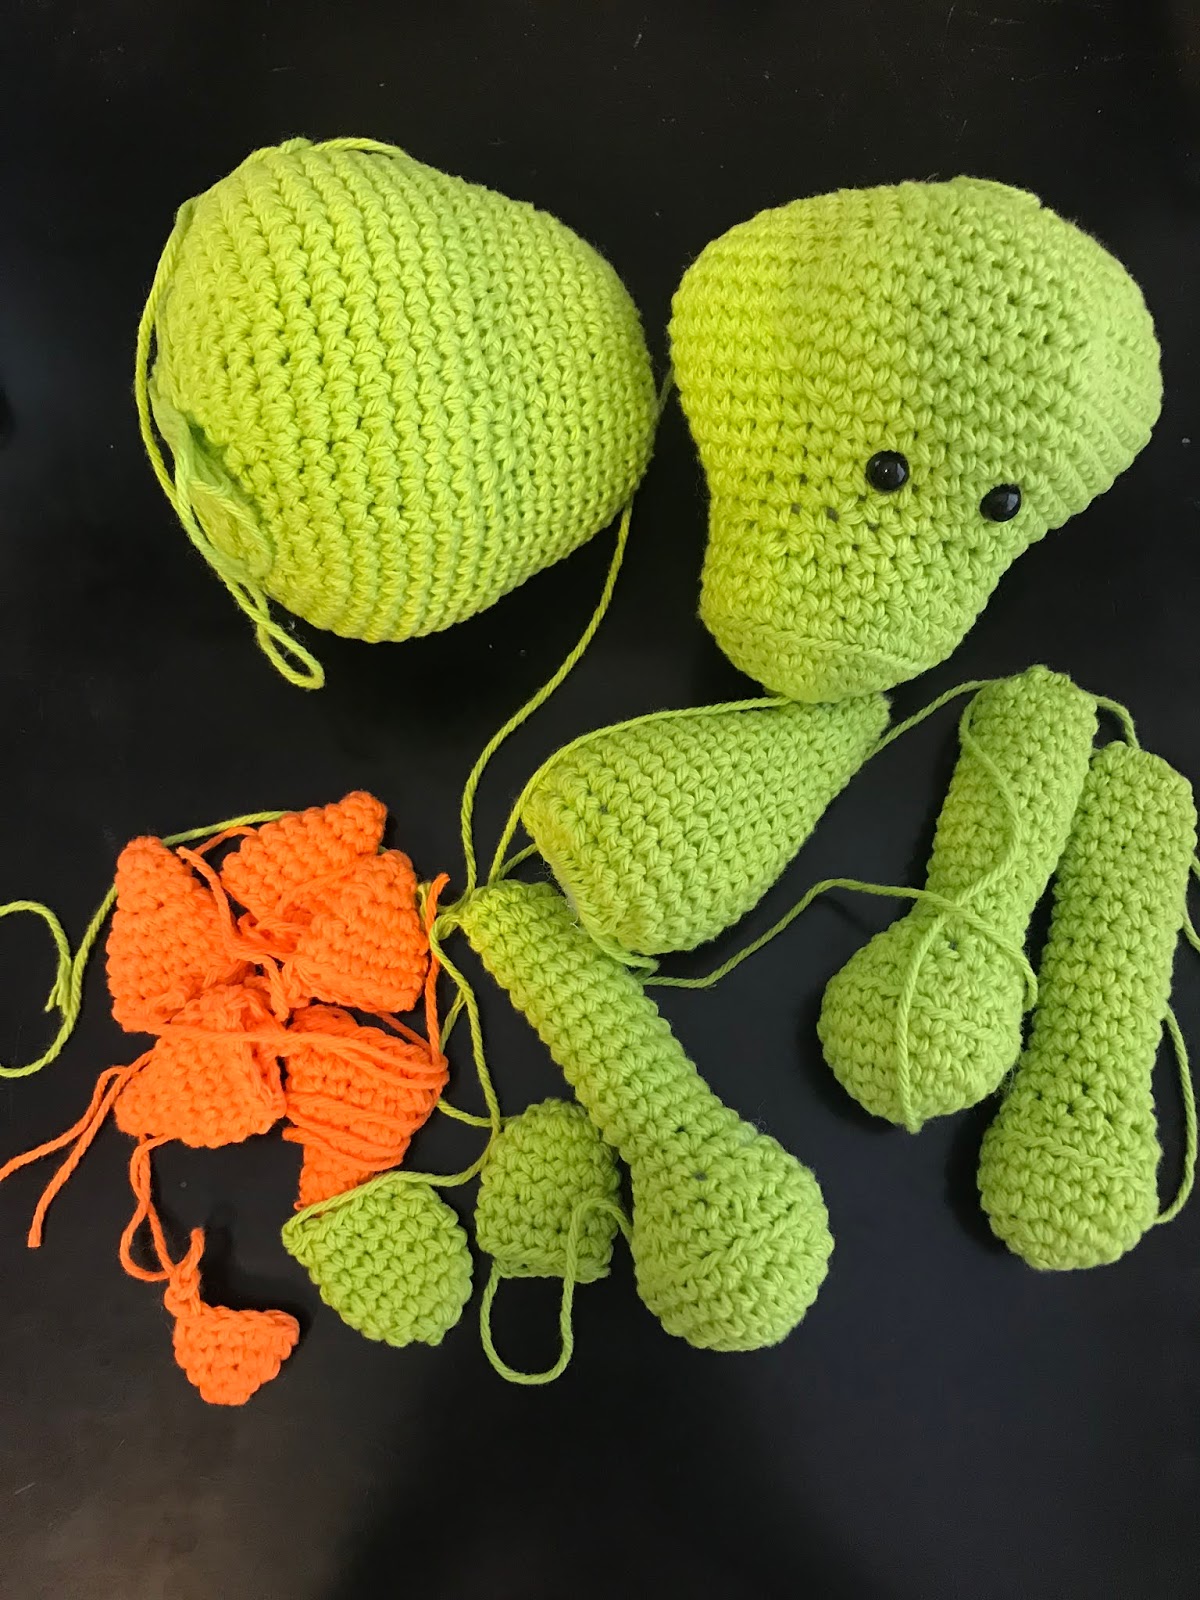
As promised I am sharing my Dragon who has been to Washington state, and PT and back!
 He reminds me of the dragon from Pete's Dragon-this FREE pattern is from Lucy Kate Crotchet.  I again learned a lot from this little guy:
* Stuff him a little more
* I personally like to use a smaller hook then just one smaller than the yarn calls for.
* I really like working with 100% cotton, less stretchy than acrylic.

I plan on selling more Amugurumi in MY Etsy shop when I get them made!  From this guy I have 5 more orders!  I think it helps when you use bright colors and FUN patterns!

Thanks SO much for stopping in today-hope your day is FANTASTIC!


Wednesday, June 27, 2018

Pinterest food find-taco Pizza

1 comment:
picture and recipe credit: Ree Drummand Pioneer Woman
Pizza AND tacos?!!!  Sign me up!!!
This recipe I found on Pinterest and comes from the talented Pioneer Woman:

Ingredients

  • 1 teaspoon Active Dry Yeast
  • 1-½ cup Warm Water
  • 4 cups All-purpose Flour
  • 1 teaspoon Kosher Salt
  • ⅓ cups Olive Oil
  • 1 can (14 Oz. Size) Black Beans
  • 1 teaspoon Taco Seasoning (prepared, Or Make Your Own)
  • 4 whole Corn Tortillas, Sliced Into Thin Strips
  • ½ cups Canola Oil, For Frying
  • 1 cup Grated Sharp Cheddar
  • 1 cup Grated Monterey Jack Cheese
  • 1 head Green Leaf Lettuce, Sliced/shredded Thin
  • 2 whole Ripe Tomatoes, Diced
  • ½ cups Cilantro Leaves
  • ¼ cups Sour Cream
  • 3 Tablespoons Hot Sauce (more To Taste)

Preparation

Make the pizza dough: Mix yeast with warm water and set aside for 8 to 10 minutes. Mix flour, salt, and olive oil in a mixing bowl. With speed on low, drizzle in yeast/water mixture. Allow to mix until totally combined. Cover bowl with a towel and set bowl in a warm, draft-free place. Allow to rise for 1 to 2 hours.
Pour black beans into a saucepan. Add seasonings to taste and heat up beans over medium-low heat. Use a potato masher to mash the beans to desired texture. Continue cooking/heating beans over medium-low heat, stirring occasionally, until no longer runny (should be the texture of refried beans. Set aside.
In a small skillet, heat canola oil over medium heat. When hot enough to fry, drop in the tortilla strips in batches, frying quickly and removing from oil with a fork when crisp–about 30 to 45 seconds per batch. Transfer to a paper towel-lined plate. Set aside.
Place oven rack in the bottom position in the oven. Preheat oven to 500 degrees.
Remove half the pizza dough from the bowl. Place remaining half in a large plastic bag and refrigerate, saving for another use. With hands, spread pizza dough on an oiled baking sheet, making sure it’s relatively thin. Spread layer of refried beans all over pizza crust. Sprinkle mixed grated cheeses over the top. Place pan in the oven (in the bottom half of the oven) and bake for 9 to 12 minutes. Watch it to make sure crust doesn’t burn.
Remove pizza from oven. Sprinkle on shredded lettuce, diced tomatoes, and cilantro leaves.
Mix together sour cream and hot sauce, adding enough hot sauce to make the mixture pourable. With a spoon (or you can put it in a pastry bag) drizzle mixture over finished pizza.
Sprinkle with tortilla strips. Cut into squares and serve immediately with good quality salsa.

Saturday, June 23, 2018

Amugurumi-kitty cat; FREE pattern link!

1 comment:
So I have REALLY enjoyed making my Amugurumi!  I have made 4 of them in a month-last week I was on a 3 hour flight and really got a lot done on my Dragon-which I will share next week!  Today I would like to share a kitty cat that I made for my cousin:
This seriously is CUTE if I do say so myself- ;) . My cousin LOVES cats and she LOVED this little dolly.  I learned that I need to slow down on the attachment of the parts and I won't have to pick them out!  I also learned how to incorporate other colors into the pattern--my goal is to eventually make a calico kitty.

This was a FREE pattern that I found on Pinterest and the direct link can be found HERE.  If you want to follow my Amugurumi pinterest board it can be found HERE.  I currently have two orders I am working on-I've been seriously thinking of selling these and someone at my son's PT ordered 2!  I'll definitely share those with you when I get them done.  I planning on selling my creations in my etsy store.  When I start listing those I will share the links!

thanks for the visit today-hope your day is FANTASTIC!


Wednesday, June 13, 2018

What we ate, pinterest food find

1 comment:
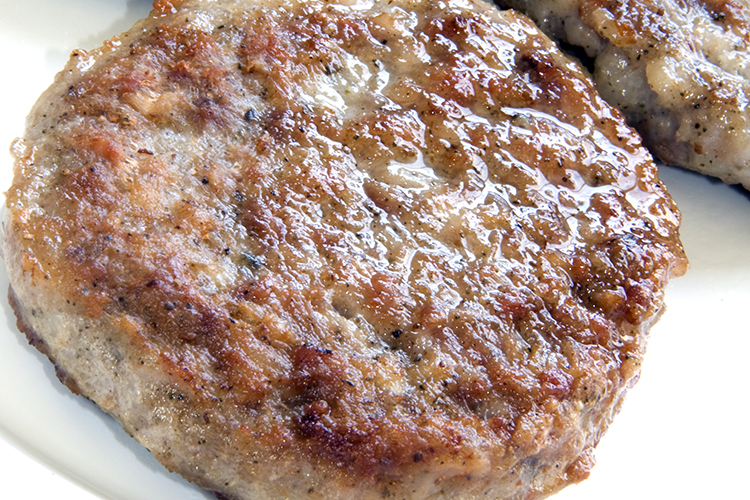
I pretty much buy ground turkey meat and was looking for new ways to cook it and I found this deliciousness:
(photo and recipe credit: skinnyms.com)

Skinny Breakfast Sausage
Ingredients
  • 1 pound lean ground turkey or chicken, (hormone and cage free recommended)
  • 1/2 teaspoon garlic powder
  • 1/2 teaspoon freshly ground black pepper
  • 1 teaspoon dried sage
  • 1 teaspoon crushed red pepper flakes (more or less to taste)
  • 1 teaspoon dried oregano
  • Kosher or sea salt to taste
Directions
  1. Combine all ingredients in a large mixing bowl. Make sausage patties to desired size and thickness. I usually get about 8 patties. Uncooked patties can be frozen up to one month.
  2. Add patties to a large nonstick skillet and cook on medium heat until brown on both sides and cooked through.

Wednesday, June 6, 2018

Homemade Hamburger Buns

2 comments:
Honestly ALL the boys gave this a thumbs up!  SO yummy don't know that I will ever buy buns anymore-you can even use this for hot dog buns!!

photo and recipe credit: Cheery Kitchen
Homemade Hamburger Buns
 
Ingredients
  • 1 tablespoon active-dry yeast
  • ½ cup (4 oz) warm water
  • ½ cup (4 oz) milk (whole, 2%, or skim)
  • 1 large egg
  • 2 tablespoons vegetable oil
  • 2 tablespoons sugar
  • 1 teaspoon salt
  • 3 cups (15 oz) all-purpose flour
  • 1 tablespoon butter
Instructions
  1. In the bowl of a standing mixer (or a large bowl, if mixing by hand), stir the yeast into the warm water and let it sit until dissolved.
  2. In a separate bowl, whisk together the milk, egg, oil, sugar, and salt. Add this to the yeast mixture and stir until combined. Add all the flour and stir until it forms a shaggy dough. Knead at low speed, or by hand against the counter, for 10 minutes. The finished dough should be smooth, feel slightly tacky, and spring back when poked.
  3. Return the dough to the mixing bowl and cover. Let the dough rise in a warm spot until doubled in bulk, about an hour.
  4. Dust your work surface with a little flour and turn out the risen dough on top. Divide the dough into 8 pieces and shape each into a tight ball. Transfer the balls to a baking sheet and let rise until they look puffy and hamburger-sized, roughly 30-40 minutes.
  5. Pre-heat the oven to 375°F.
  6. Melt the butter and brush it over the risen hamburger buns. This helps the tops to brown and keeps the crust soft. Bake the buns until golden, 15-18 minutes.
  7. Let the buns cool to room temperature before slicing and using. They are best if eaten within the next day or two, but will keep in an airtight container on the counter for up to a week.

Wednesday, March 28, 2018

Pinterest Food find: Super Lemon Bundt Cake

1 comment:
Our family LOVES lemons-honestly it's sort of silly how much we love them!  My mom gave me a few lemons straight off the tree and I decided to make a bundt cake-I turned to Pinterest and found this DELICIOUSNESS:
Picture and recipe from: Sprinkles Some Sugar
Ingredients:
Lemon Cake
2 1/4 cups all-purpose flour
2 1/4 tsp baking powder
1/2 tsp salt
4 eggs
2 cups sugar
1 tsp vanilla extract
2 tbs lemon zest
2 tbs + 2 tsp lemon juice
1 1/4 cups whole milk
10 tablespoons unsalted butter, cubed
Lemon Glaze
1 1/2 cups powdered sugar
3-5 tbs lemon juice
Lemon Sugar Topping
1 tbs lemon zest
1 tbs granulated sugar

Instructions:
Preheat oven to 350 degrees Grease a bundt pan very well making sure to really get into all crevices then lightly flour pan. Set aside.
Lightly whisk flour, baking powder and salt in a small bowl and set aside. In the bowl of your stand mixer (if you're using one) fitted with the paddle attachment, beat eggs on low until they are thickened and very pale yellow in color. Turn mixer on low and slowly add sugar to running mixer and beat on medium-high speed until light and fluffy. Stir in vanilla, lemon juice and lemon zest. Slowly pour in dry ingredients on low speed until combined.
In a small saucepan, heat milk until very hot and butter is just melted. Do not boil and whisk the mixture to help the butter along. Pour into batter and mix until smooth. Batter will be very thin. Pour into prepared baking pan and bake for 27-35 minutes or until a toothpick inserted into the center comes out with a few moist crumbs. Once done, remove cake from oven and allow to cool for 5 minutes in pan. Release the sides of the cake with a butter knife to ensure it isn’t going to stick. Turn cake onto a large round platter or cake stand. (If using a 9x13 pan, do not remove cake, just place entire pan onto wire rack so underneath the pan can cool also.) Allow cake to finish cooling until warm to the touch.
While cake is cooling, prepare lemon sugar and glaze. For the lemon sugar, thoroughly mix the lemon zest and sugar together and let it sit for 5 minutes. If you don’t want the lemon zest on top of the cake, push the sugar through a fine mesh strainer, separating the two and discard the zest. If you don’t mind the zest on top of your cake (it will give it a nice pop of color!), then just set the mixture aside.
For the glaze, whisk powdered sugar and lemon juice, using more or less lemon juice as needed to get desired consistency. (I like to keep mine slightly thick so it won’t thin out too much when I serve it over warm cake.)Once cake is cooled down slightly, drizzle glaze over warm cake. Alternately, you can drizzle the glaze over each individual piece being served. Sprinkle lemon sugar on top.
Cake will stay soft and moist for 3 days stored in an airtight container.

Wednesday, March 21, 2018

Pinterest Food Find-Creamy Chicken Quinoa and Brocolli Casserole

1 comment:
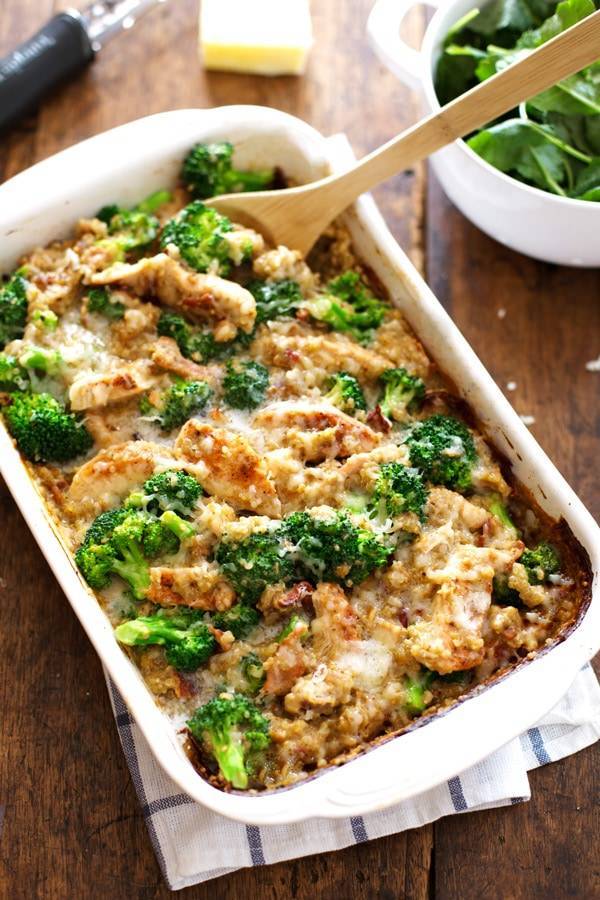
I made this for dinner on Monday night and 3 out of 4 of us REALLY liked this-I TOTALLY recommend adding the optional bacon! ;)
  • photo and recipe credit a Pinch of Yum
  • 2 cups reduced sodium chicken broth
  • 1 cup milk (I used 2%)
  • 1 teaspoon poultry seasoning
  • 1/2 cup flour
  • 2 cups water, divided
  • 1 cup uncooked quinoa, rinsed
  • 1/4 cup cooked, crumbled bacon (optional… sort of)
  • 1 pound boneless skinless chicken breasts
  • 2 teaspoons seasoning (like Emeril’s Essence or any basic blend you like)
  • 1/4 cup shredded Gruyere cheese (any kind will work)
  • 3 cups fresh broccoli florets

INSTRUCTIONS

  1. Sauce: Preheat the oven to 400 degrees and generously grease a 9×13 baking dish (seriously, be generous because it really really sticks to the sides). Bring the chicken broth and 1/2 cup milk to a low boil in a saucepan. Whisk the other 1/2 cup milk with the poultry seasoning and flour; add the mixture to the boiling liquid and whisk until a smooth creamy sauce forms.
  2. Assembly: In a large bowl, mix the sauce from step one, one cup water, quinoa, and bacon and stir to combine. Pour the mixture into the prepared baking dish. Slice the chicken breasts into thin strips and lay the chicken breasts strips over the top of the quinoa mixture. Sprinkle with the seasoning. Bake uncovered for 30 minutes.
  3. Broccoli: While the casserole is in the oven, place the broccoli in boiling water for 1 minute until it turns bright green and then run under cold water. Set aside.
  4. Bake: Remove the casserole from the oven, check the mixture by stirring it around in the pan, and if needed, bake for an additional 10-15 minutes to get the right consistency. When the quinoa and chicken are cooked and the sauce is thickened, add the broccoli and a little bit of water (up to one cup) until the consistency is creamy and smooth and you can stir it up easily in the pan. Top with the cheese and bake for 5 minutes, or just long enough to melt the cheese.

Wednesday, January 31, 2018

What we ate; pinterest inspired: Cauliflower Crusted Grilled Cheese Sandwiches

1 comment:
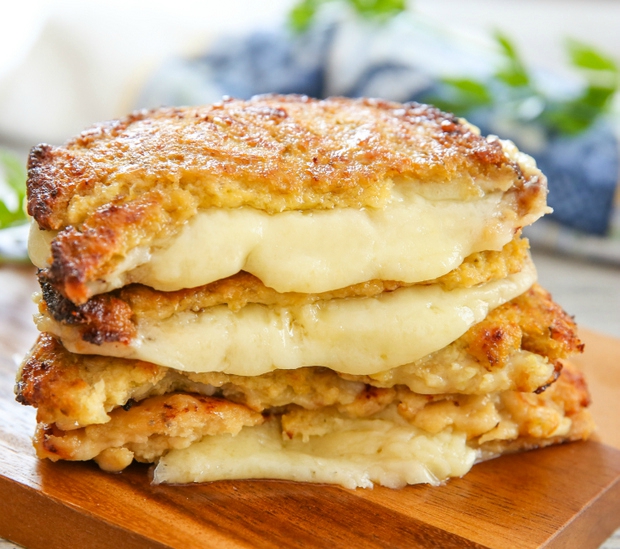
photo and recipe credit found HERE.
These were YUMMY-and no it didn't taste like Cauliflower.  I had these for lunch one day.  If you want picture for picture tutorial-click on the link above.  The only thing that I changed was to add a sprinkle of garlic because I love it!

INGREDIENTS:

  • 1 medium head of cauliflower (raw), cut into small florets and stem removed
  • 1 large egg
  • 1/2 cup shredded Parmesan cheese
  • 1 tsp Italian herb seasoning
  • *I added a sprinkle of garlic
  • 2 thick slices of white cheddar cheese (you can also use shredded cheddar cheese)
  • DIRECTIONS:

    1. Preheat oven to 450F. Place cauliflower into food processor and pulse until crumbs about half the size of a grain of rice.
    2. Place cauliflower into large microwave safe bowl and microwave for 2 minutes. Your cauliflower should be soft and tender (and hot!). (If you don't want to use the microwave to dry out the cauliflower and prefer to steam and wring with a cloth to dry, check out my wringing instructions here.)
    3. Stir cauliflower to mix up the bottom and top cauliflower. Place back into the microwave and cook for another 3 minutes. Remove and stir again so that all the cauliflower cooks evenly. Place back into microwave and cook for 5 minutes. At this point, you should see the cauliflower is starting to become more dry. Microwave for another 5 minutes. Cauliflower should still be slightly moist to the touch, but should look dry and clumped up (like photo above; similar to as if someone had chewed it up and spit it back out.) If you've made cauliflower pizza or breadsticks with the cloth wringing dry method, it should look the same.
    4. Allow cauliflower to cool for a few minutes. Then add in egg and cheese. Stir to combine until smooth paste forms. Stir in seasoning. Divide dough into 4 equal parts. Place onto large baking sheet lined with parchment paper. Using your knuckles and fingers, shape into square bread slices about 1/3 inch thick. Bake cauliflower bread for about 15-18 minutes or until golden brown. Remove from oven and let cool a few minutes.
    5. Using a good spatula, carefully slide cauliflower bread off of parchment paper. Now you are ready to assemble your sandwiches. You can do this a few different ways. You can either cook on the stove top as you would normally cook a grilled cheese. You can also place sandwiches into toaster oven and broil for several minutes (5-10) until cheese is completely melted and bread is toasty. If you don't own a toaster oven, you can also do this in the oven.

Wednesday, August 30, 2017

pinterest food find. Old Fashioned pancakes

1 comment:
Breakfast for dinner-YES please!
Recipe and photo from: Key Ingredient

Old Fashioned Pancakes:
  • 3 1/2 teaspoons baking powder
    1 1/2 cups all purpose flour
    1/2 to 1 teaspoon salt, to taste
  • 1 Tablespoon white sugar
    3 Tablespoons butter, melted
    1 egg
    1 1/4 cups milk


  • Sift together flour, baking powder, salt and sugar in a large bowl. Whisk in melted butter, egg, and milk until combined. Let batter rest for 5 minutes. Preheat a large skillet over medium-high heat. Spray with spray. Pour batter into the hot skillet, about 1/4 cup of batter for each pancake. Cook for 2 to 3 minutes, until bubbles appear on the sides and center of each pancake. Flip and cook until golden, about 1 to 2 minutes.

Wednesday, July 5, 2017

Pinterest Food Find Sweet Potato Turkey Sausage Egg Bake

1 comment:
Yes, the description is a mouthful but this really was SO tasty!!  My 14 year old who does NOT like Sweet Potatoes scarfed this up QUICK!!

Photo and recipe credit: The Real Food Dietitans
SWEET POTATO TURKEY SAUSAGE EGG BAKE
 

Prep time
Cook time
Total time
 
This egg bake combines a blend of ingredients that creates a perfect sweet and savory dish. The sweet potatoes bring out a little sweetness while the turkey sausage creates the savory flavor. This egg bake is a satisfying breakfast option because it provides an adequate source of carbohydrates, fats and proteins.It's a delicious way to start the day and re-heats nicely so great for enjoying as leftovers.
Author: 
Recipe type: Breakfast | Eggs | Whole30 | Paleo
Serves: 4 servings
INGREDIENTS
  • ½ tbsp. coconut oil
  • 1 medium sweet potato, cubed (~2 cups cubed)
  • ½ lb. turkey sausage such; could also sub 4-6 strips of bacon or 1 cup cubed ham
  • ½ small red onion, chopped or sliced (1/3 cup)
  • ½ red bell pepper, chopped or sliced  (½ cup)
  • 3-4 cups spinach leaves
  • 7 whole eggs
  • Sea salt & pepper
  • Avocado, sliced (optional)

INSTRUCTIONS
  1. Preheat oven to 400 degrees. Grease a 9x9-inch round or square glass dish with coconut oil or organic cooking spray.
  2. In a medium saute pan, heat coconut oil on medium-high heat. Once oil is hot, add sweet potato cubes. Dash with sea salt. Cover and let cook for about 10 minutes or until sweet potatoes are tender. Stir occasionally. Add water if needed for moisture.
  3. Meanwhile, in another saute pan on medium high heat, begin to brown turkey sausage.
  4. Brown for 4-5 minutes and then add chopped onions and red bell pepper.
  5. Continue to cook for 2-3 minute or until peppers are soft and onions are translucent. Add spinach and cook for 1-2 minutes.
  6. In a bowl, crack the eggs, add a dash of sea salt and pepper and whisk.
  7. In the 9x9-inch dish. Layer the cooked sweet potatoes, then the turkey sausage and vegetable mixture and then pour the eggs evenly over all.
  8. Bake in the oven for 16-18 minutes or until center is firm.
  9. Remove from oven, let set for 5 minutes.
  10. Serve with sliced avocado if desired.

**To make turkey sausage. Brown 1 lb. of ground turkey. Add 1 tsp. garlic powder, ½ tsp. fennel, 1 tsp. Italian seasoning, a pinch of cayenne, ½ tsp. sea salt and ¼ tsp. black pepper.

All photos and content are copyright protected. Please do not use our photos without prior written permission. If you wish to republish this recipe, please rewrite the recipe in your own unique words and link back to the source recipe here on The Real Food Dietitians so credit is given where credit is due. Thank you!
NUTRITION INFORMATION
Serving size: ¼ of recipe Calories: 330 Fat: 18 g Carbohydrates: 16 g Sugar: 4 g Sodium: 480 Fiber: 3 g Protein: 24 g