
Friday, January 29, 2016
Thursday, January 28, 2016
16.
if you wore braces--do you remember the day they came off? I sure do!! I was SO excited, I'd had them on for like 3 1/2 years, AND I got to wear that NASTY on top of the headgear. It wasn't the cool kind that you wore on the back of your neck either--it was on the top of my head. My braces were also brackets around EACH tooth--yeah I REMEMBER the day when I was FREE! ;)
As you can tell from the pictures my girl was ELATED to get those suckers OFF! She actually let me take a picture--teenagers...seriously...


For this layout I used the Fresh Start kit from Scrapbook Circle....
I'm off and running busy today--I REALLY appreciate the visit and hope that your day is TOTALLY fantastic for ya!
Tuesday, January 26, 2016
July 3.
I created this page for JustNick Studio--I was able to work in 4 different cuts!


I really enjoyed mixing between mist and different colored card stock to get the affect that I did for this layout. The cuts I used were:
I honestly enjoy working with Nicole's cuts they are unique and SO fun to create with! Thanks so much for the visit today!!
Monday, January 25, 2016
candid.
I was inspired by the mood board over at Scrapbook Circle for this layout:


Thanks for the fun trip down memory lane and the visit!
Saturday, January 23, 2016
fabulous, happy day.
I pretty much love this whole page--everything about it makes me happy! the picture the paper, and the memory--LOVE it! For our fall break we went back east to explore--seriously a trip of a lifetime--LOVED that I could experience something new with the family.


I was pretty excited to use one of my new toys that I got from Christmas
Fujifilm Instax Share Smartphone Printer I seriously am in LOVE with the thing! I really like that it prints pics from my phone and I can see what is going to print. We bought mine off of Amazon, and was a little cheaper than what it is now. Either way it's a great little toy that is small and sits right on my desk!
For this layout I used the Fresh Start kit from Scrapbook Circle--THANKS so much for the visit today!!
Friday, January 22, 2016
Applesauce Oat Muffins
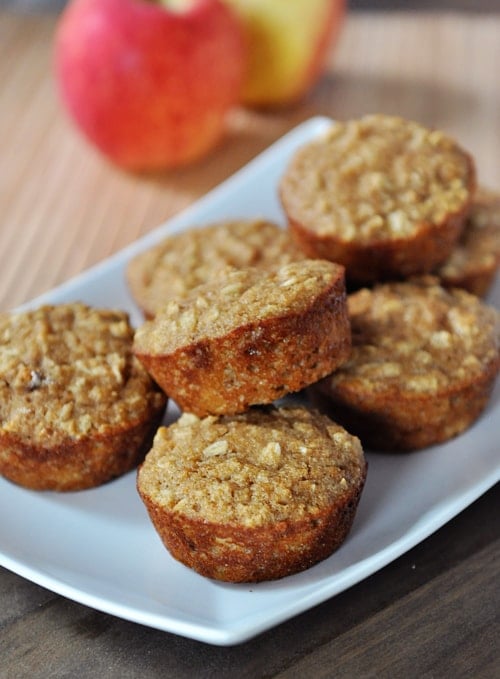
photo and recipe credit: Mel's kitchen
INGREDIENTS
- 1 cup rolled/old-fashioned oats
- 1 cup unsweetened applesauce
- 1/2 cup milk
- 1 large egg
- 1 teaspoon vanilla
- 4 tablespoons butter or coconut oil, melted
- 1/3 cup sugar
- 3/4 cup whole wheat flour
- 1 teaspoon baking powder
- 1/2 teaspoon baking soda
- 1 teaspoon cinnamon
- 1/4 teaspoon salt
- 1/2 cup dried cranberries or raisins, optional
DIRECTIONS
- Preheat the oven to 375 degrees F. Line a 12-cup muffin tin with liners or grease the muffin cups. Set aside..
- In a medium bowl, stir together the oatmeal, applesauce, milk, egg, vanilla, butter and sugar. Set aside.
- In a large bowl, whisk together the flour, baking powder, baking soda, cinnamon and salt (and cranberries or raisins if using). Make a well in the center and pour in the applesauce mixture. Stir until just combined (don't overmix or the muffins will be dense and dry). The muffin batter texture might be a bit different (wetter?) than other muffin batters but no fear, carry on!
- Distribute the batter evenly among the 12 muffin cups. Bake for 15-20 minutes until a toothpick inserted in the center comes out clean. Don't overbake or the muffins will be dry.
- Remove the muffins to a rack to cool completely. Once cool, I place 6-9 muffins in a large freezer ziploc bag, suck all the air out (oh yes I do) and seal the bag, then freeze, pulling them out one by one to stick in my kids lunches or warm slightly for a snack.
Thursday, January 21, 2016
family together.
These two boys are seriously inseperable--they have ALWAYS been that way! They were in heaven when we stayed with them for a week last summer. So cute--I love this page because it's colorful just like these two boys!


Thanks SO much for the quick visit today--I created this page with the January kit from Scrapbook Circle called Fresh Start--thanks again!
Sunday, January 17, 2016
pinterest food find. Easy banana nut muffins.

photo and recipe credit: Happy Pretty Blog
Easy Banana Nut Muffins
Ingredients
- 1 c. white sugar
- ½ c. vegetable oil
- 3 large ripe bananas
- 2 eggs
- 2 c. flour
- 1 tsp. salt
- ½ tsp. baking soda
- 1 tsp. baking powder
- 1 tsp. vanilla
- 1 c. chopped walnuts
Instructions
- Preheat oven to 350 degrees.
- In a mixing bowl or stand mixer, cream sugar and oil together. Then add your bananas and eggs.
- Sift all the dry ingredients together in separate bowl and then mix with the wet. Or if you’re like me, just throw those all into the mixer too. It still turns out just the same!
- Add the vanilla last and make sure to give it a good mix so that the batter is even.
- Pour into a greased muffin pan. Sprinkle walnuts on the top.
- Bake at 350 degrees for about 30 minutes.
Thursday, January 14, 2016
ME.
I wanted to share real quick with you a layout I made using 4 different cuts from the JustNick Studio as an introduction to my term on the team:


first off the picture cracks me up! It was the first time I ever had crab, my friend and I went to a restaurant and got a little messy! I MIGHT have been a little excited! ;)
The cuts I used were:
Thanks SO much for the visit today!!
Sunday, January 3, 2016
pinterest food finds. Chicken Noodle Casserole

food and photo credit: The taylor house
INGREDIENTS
- 2 cups uncooked egg noodles
- 2 cups cubed cooked chicken
- 1 package {16oz.} frozen peas, carrots, beans and corn
- 1 cup milk
- 1 can Cream of Chicken Soup
- 1 Can Cream of Mushroom Soup
- 1/2 tsp. Salt
- 1/2 tsp. Pepper
- 1/2 cup Chopped onion
- 2 TBSP. Melted Butter
- 1/2 tsp. Garlic Salt
- 1/2 tsp. Italian Seasoning
INSTRUCTIONS
Cook noodles according to package directions.
Meanwhile, in a large bowl, combine the remaining ingredients.
Drain noodles; add to chicken mixture.
Transfer to greased 8 inch cake pan (I used a pie plate like THIS one).
Cover and bake remaining casserole at 350 for 30 minutes. Uncover and bake 10-15 minutes longer until heated through.
Saturday, January 2, 2016
Just Nick Design team!
I SUPER excited to announce that I will be returning for JustNick Studios as a designer!

Here is the announcement!
Friday, January 1, 2016
Happy New Year!!
Took a bit of a hiatus to be with family--yeah for the new year! Hope it is an AWESOME one for you!!

Subscribe to:
Posts (Atom)