Tuesday, August 26, 2014

create today.

3 comments:
So I can't believe I haven't shared this creation with all of you yet!  I made this for a blog post challenge for American Crafts.  For full description of the creation process click HERE.

closeup of the title:

My favorites about this creation:
* I made it for my mommy--she is a quilter and YES she loved it!
* LOVE this line of paper!! (Plus One)
* I repurposed a frame--I spray painted it black.
* the quilting on this took FOREVER--but I love what it looks like up close.
* I was able to sneak some washi (see the bottom of the title card)

Thanks SO much for the visit today--hope your day is FANTASTIC!

Sunday, August 24, 2014

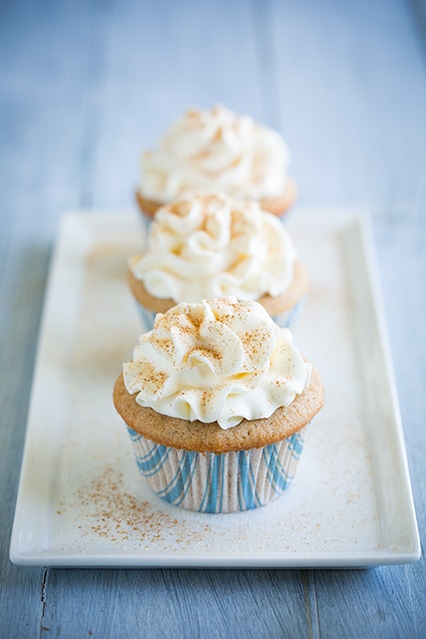
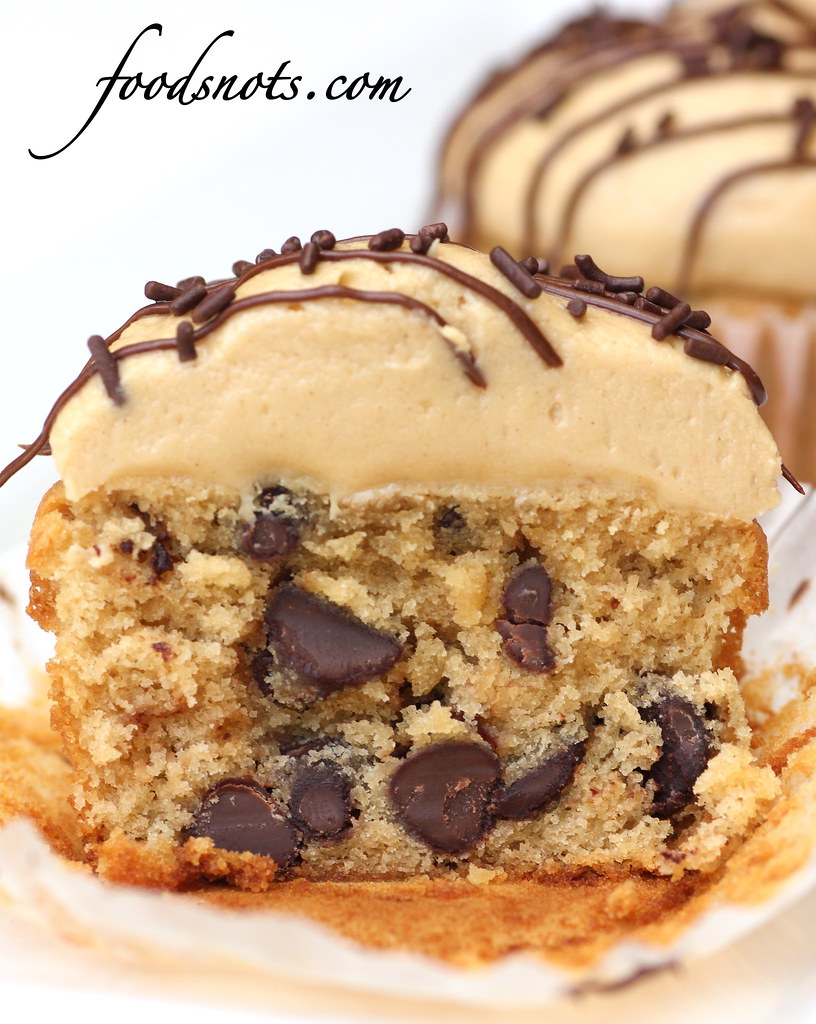
pinterest cupcakes. snickerdoodle AND peanut butter chocolate chip.

No comments:
Last Sunday we held a family birthday party for my girl who turned 16!  My son and I couldn't decide which NEW recipe for cupcakes we wanted to try so we made TWO.  They were both DELICIOUS.

First were the Snickerdoodle Cupcakes--they taste JUST like Snickerdoodles.  I liked them, they are a bit sweet so ONE was good for me.  But I would make them again:


Snickerdoodle Cupcakes:
Prep Time: 20 minutes
Cook Time: 18 minutes
Yield: 12 cupcakes--it REALLY does yield this many!
Ingredients
  • 1 1/3 cups all-purpose flour
  • 2 Tbsp cornstarch
  • 2 tsp ground cinnamon, divided
  • 1 pinch ground nutmeg (I used a scant 1/8 tsp)
  • 1 tsp baking powder
  • 1/8 tsp baking soda
  • 1/4 tsp salt
  • 1/3 cup unsalted butter, at room temperature
  • 3 Tbsp vegetable oil
  • 3/4 cup + 2 tsp granulated sugar, divided
  • 2 Tbsp packed light-brown sugar
  • 2 large eggs
  • 1 tsp vanilla extract
  • 1/4 cup whole milk
  • 1/4 cup buttermilk
  • 1 recipe Vanilla Buttercream Frosting, recipe follows
Directions:
  • Preheat oven to 350 degrees. In a mixing bowl whisk together flour, cornstarch, cinnamon, nutmeg, baking powder, baking soda and salt for 30 seconds, set aside.
  • In the bowl on an electric stand mixer fitted with the paddle attachment, whip together butter, 1 Tbsp of the vegetable oil, 3/4 cup granulated sugar, and light-brown sugar on medium-high speed until pale and fluffy. Blend in remaining 2 Tbsp vegetable oil. Mix in eggs one at a time blending until combined after each addition and adding in vanilla with second egg. Blend together milk and buttermilk in liquid measuring cup or bowl. With mixer set on low speed, add in 1/3 of the dry ingredients in three separate batches alternating with 1/2 of the milk mixture, beginning and ending with flour and mixing just until combined after each addition.
  • Divide batter among paper lined muffin cups, adding about 1/4 cup batter to each cup and filling 2/3 full. Bake in preheated oven 17 - 20 minutes, until toothpick inserted into center comes out clean. Remove from oven and allow to cool in muffin tin several minutes before transferring to a wire rack. Allow to cool completely then frost with vanilla buttercream frosting, then in a small bowl, whisk together remaining 2 tsp granulated sugar and 1/2 tsp cinnamon. Dust tops of cupcakes lightly with cinnamon sugar mixture.
  • The Second Cupcake that we made was a Peanut Butter Chocolate Chip Cupcake--oh my LOVED this one!  This was a heavier cupcake but rich and DELICIOUS, my favorite part was the Peanut Butter frosting--DEFINITELY making this one AGAIN!

  • Peanut Butter Chocolate Chip Cupcakes:
     1 cup unbleached all purpose flour
     1 tsp baking powder
     1/4 tsp salt
     6 tbsp unsalted butter, at room temperature
     3/4 cup smooth all natural peanut butter, at room temperature
     1/2 cup packed brown sugar
     1/2 cup sugar
     2 large eggs
     1 tsp vanilla extract
     1/2 cup whole milk
     2 cups semi-sweet chocolate chips
Peanut Butter Frosting
     6 ounces unsalted butter, room temperature
     1/2 cup confectioners’ sugar
     1/2 tsp salt
     1 cup creamy peanut butter, natural (or if you want a smoother look, go not-natural)
     1/2 tsp pure vanilla extract
     1/2 cup whole milk
For Cupcakes:
Preheat oven to 350 degrees F.  Combine milk and vanilla in small bowl.  Combine flour, baking powder and salt in another small bowl.  Beat Butter and sugars in mixer until light and fluffy.  Add eggs and blend until smooth. Slowly mix in peanut butter.  Add half the flour mixture and blend slowly.  When fully incorporated, add milk mixture. Continue to blend slowly. Add remaining flour mixture and mix on low speed just until incorporated.  Add chocolate chips.  Fold in by hand.  Scoop into 12 lined baking cups.  Bake for about 22 minutes, or until tops spring back when lightly touched and the edges are golden brown.  
For Frosting:
Combine sugar and salt in a bowl. Combine milk and vanilla in another bowl.  Add butter and peanut butter to mixer.  Beat until smooth and creamy.  Alternately add sugar and milk mixture until fully incorporated.  Add additional milk ONLY if needed for a softer consistency. You can also add additional powdered sugar if you need to make your frosting thicker.  You want your frosting to resemble this consistency.  Frost on top of cooled cupcakes.  If desired, pipe melted chocolate on top of frosting and add chocolate sprinkles before chocolate has set.

Saturday, August 23, 2014

good stuff, ride.

3 comments:
For my One item wonder this month on the Scrapbook Circle blog I focused on the different sheets of AWESOME pattern paper in the Island Paradise kit.  For the background I cut the pattern papers to 1 1/4" by 3" then layered them on top of each other.  I finally ended it by painting and splattering gold Color Shine on top.
 closeup:

My Favorites about this layout:
* the pictures! (don't I always say that?)  They crack me up, this is my 5' 9" boy with his 4' 11" cousin-they are pretty much inseparable when they get together--these were taken in Utah.
*the overlapping fun tag.
*the sewing.
*the color shine--LOVE the gold.

Hope I inspired you today--thanks SO much for the visit!!

Thursday, August 21, 2014

sassy girl.

3 comments:
I was up on the American Crafts blog the other day with a challenge which was to use bling, brads, and buttons.  I'm not sure if you can tell from this picture but the yellow flowers are glittery,  the other yellow & green have enamel dots, and the chevron is a brad.  This is all from the Plus One collection--if you didn't know that by now it is seriously MY favorite SO diverse!

My favorites about this layout:
* I used a HUGE die cut and backed it, tedious YES, but I LOVE how it turned out!
* those pictures CRACK me up!  They are my sassy mommy when she was a little girl.
* love the background dot paper, I wanted to keep the strip on the bottom as part of the layout so I just cut off the top to make it measure to 12 x 12.
* using glitter on my page!

Thanks SO much for the visit today--hope you were inspired today!

Tuesday, August 19, 2014

live true.

2 comments:
I wanted to share my very last gallery items for American Crafts:

my favorites about this page:
* the picture, this is my girl with her two best friends--SO fun that they were all doing the same thing at the same time.  (this was taken at the practice for the Cultural Celebration for the dedication for the Gilbert Temple)
* the vibrant colors on this page--I used the Plus One line by AC.
* the triangles are actually leftover from another project--I couldn't throw it away!
* the journaling block, I actually took my x-acto knife and cut the X to over lap the picture.

Thanks for the visit today--hope your day is FANTASTIC!!

Monday, August 18, 2014

photography tips.

2 comments:
I LOVE taking pictures--always have, it's a fun hobby for me.  I recently sent my camera in for cleaning--talk about STRESSFUL, it was like cutting my arm off!  (it needed a good cleaning, PLUS the grips were coming off!)
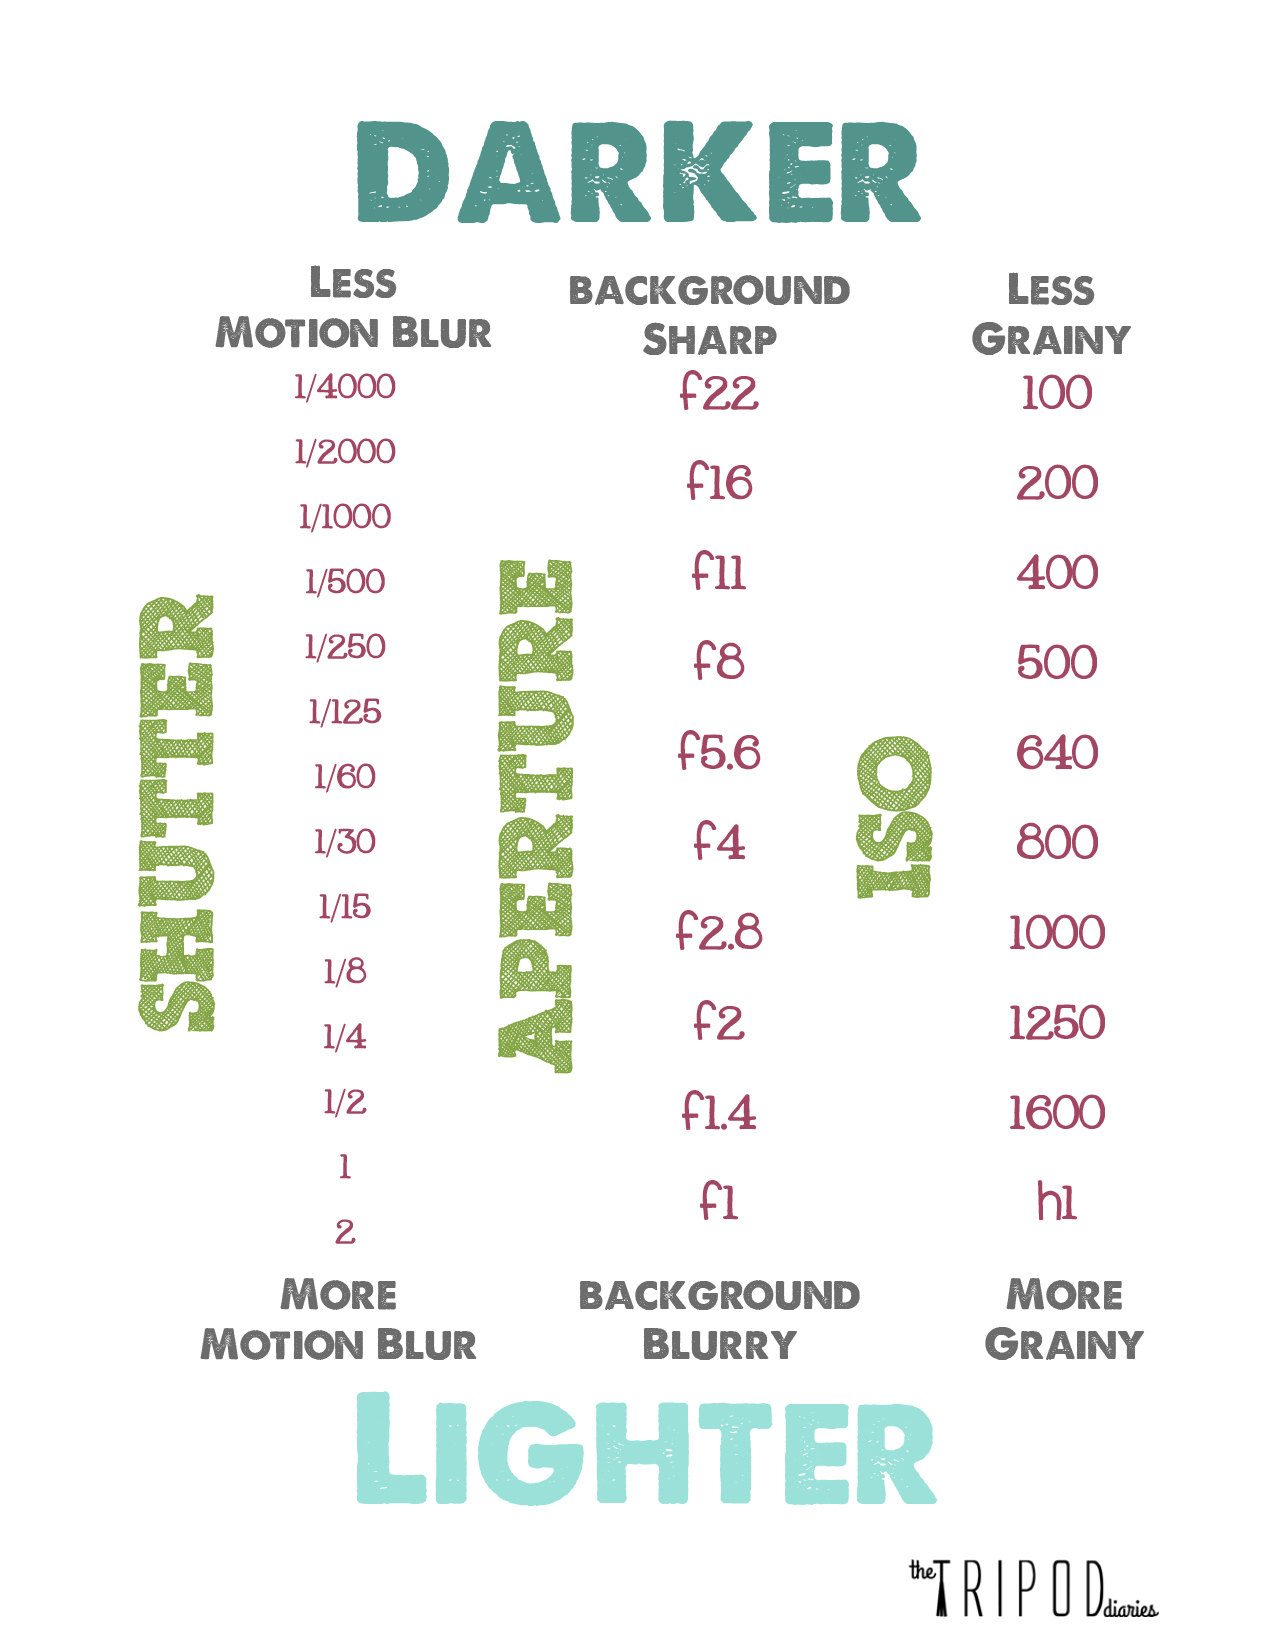
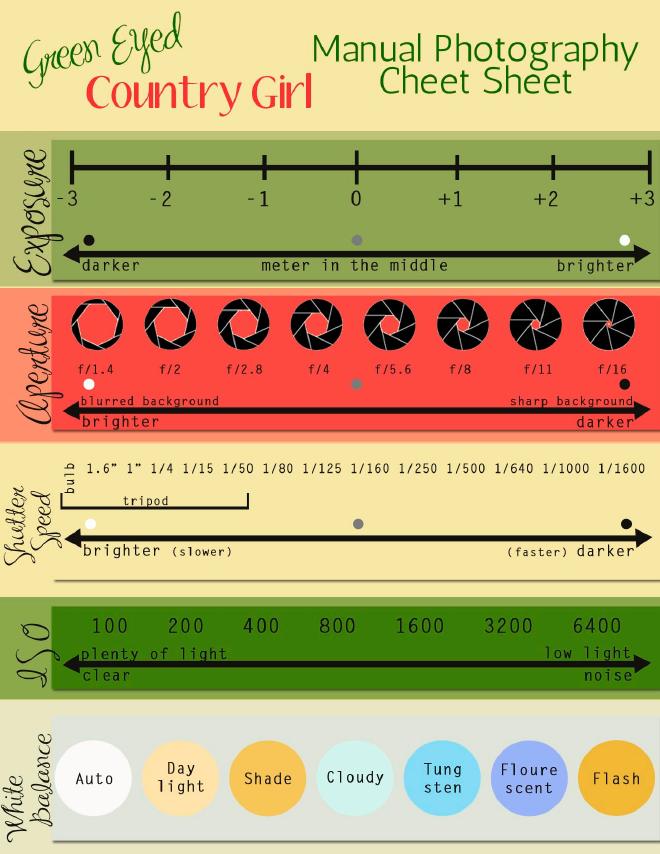
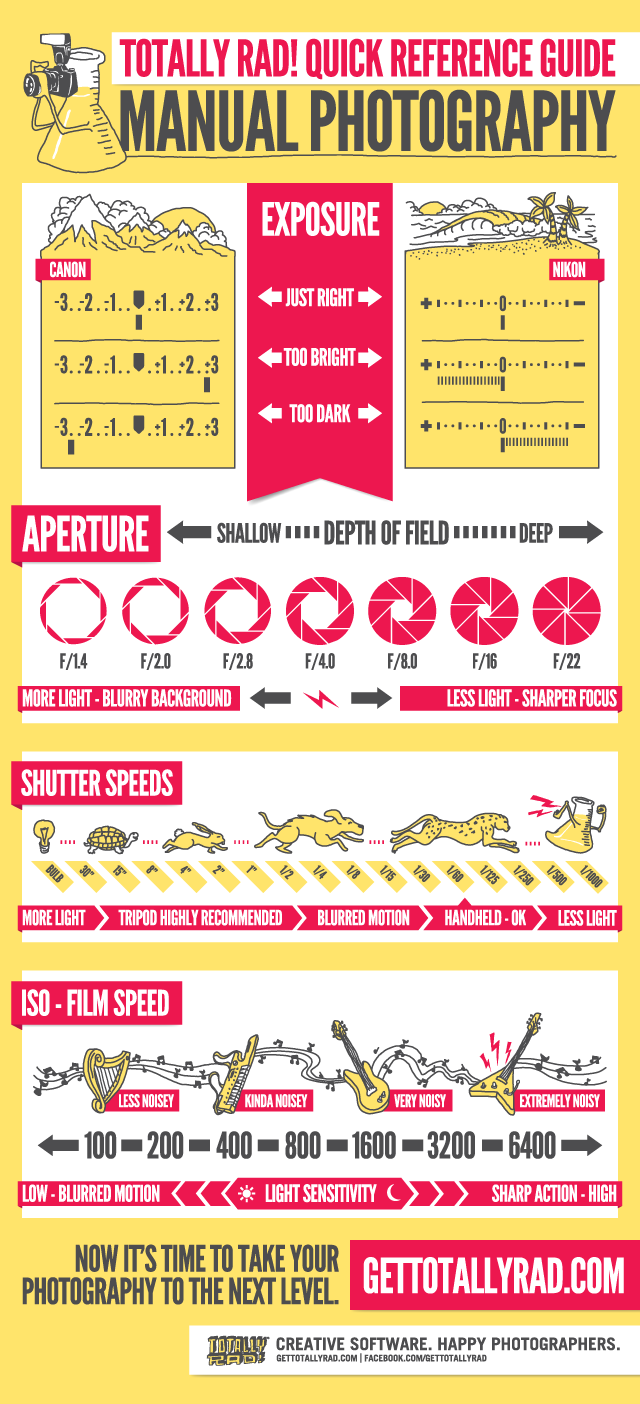
I'm always looking for new was to take better pictures.  I am a study it out and try it kind of girl.  I personally subscribe to the Digital Photography school blog.  The other day they had 15 of the best cheat sheets for taking better pictures.  Of course not all of the sheets stood out to me but the few that did were:
what are your favorite places to get photography ideas?  What do you shoot with?
Thanks for the visit-looking forward to hearing from you!


Sunday, August 17, 2014

Pinterest Food Finds

2 comments:
Today I am going to include SEVERAL different recipes that I found and LOVED!  I felt like a true food CHEMIST, experimenting, having a little faith the recipe would work and then PLEASED with the results!

what I liked about this recipe is that they give VARIATIONS on what you can make with just a simple recipe see A BEAUTIFUL MESS for more ideas!

Simple Chocolate Cupcakes makes 1 dozen
2 1/4 cups flour 
1/4 cup cocoa 
2 cups sugar
2 teaspoons baking soda 
1/2 teaspoon salt 
2 cups water 
2/3 cup oil 
1/4 teaspoon vanilla extract
2 tablespoons vinegar (Note: this cupcake recipe is vegan friendly!)
In a bowl whisk together the dry ingredients. In another bowl mix together the wet ingredients. Combine these and stir just until no lumps are left. Pour the batter into a lined cupcake pan and bake at 350 F for 22-25 minutes.
**MY TAKES**
- I ended up making 2 dozen because I didn't fill my muffin tins all the way up--they were still a nice size.
- I was surprised that there weren't any eggs!  
- NO, it didn't taste like vinegar--it had a nice light chocolate taste.

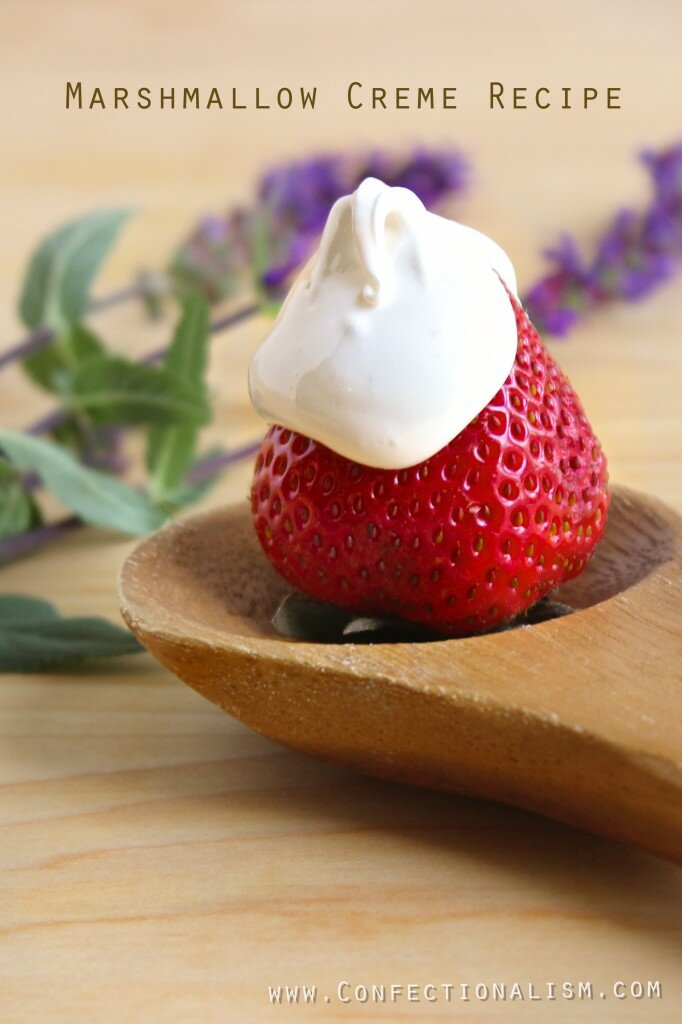
I decided that I wanted to make homemade hostess cupcakes.  That was wonderful, except for the fact I didn't have any Marshmallow Creme, it was HOT outside and I didn't want to run to the store.  What to do?  I checked out recipes on how to make my own Marshmallow Creme of course!  I chose two and this is the one that is AMAZING:
Yield- 3 cups
Ingredients:
  • 1 cup granulated sugar
  • 1/2 cup light corn syrup
  • 1/3 cup water
  • pinch of salt
  • 2 large egg whites, at room temperature
  • 1/2 teaspoon cream of tartar
  • 2 teaspoons pure vanilla extract
Directions:
  1. Stir together the sugar, corn syrup, water, and salt in a medium, heavy bottomed, saucepan over high heat.
  2. Bring to a boil, stirring occasionally, until the mixture reaches 240°F on a candy/fat thermometer. Read next step to prepare meringue while you wait.
  3. While the sugar is boiling: Place the egg whites and cream of tartar in the bowl of a stand mixer fitted with the whisk attachment. Begin whipping the egg whites to soft peaks on medium speed. (you want the egg whites whipped and ready, so when the suer syrup comes to 250 degrees F you can immediately drizzle it in. If they’re whipping up faster than your syrup is coming to temperature, just stop the mixer at soft peaks until the syrup is to temp.)
  4. When the syrup reaches 240°F, reduce the mixer speed to low and slowly pour about 3 tablespoons of syrup into the egg whites to warm them Slowly pour in the rest of the syrup, between the bowl and the whip. Increase the speed to medium high and whip until the marshmallow crème is stiff and glossy, about 6 minutes.
  5. Add in the vanilla and whip 1 minute more.
  6. Use immediately or store in an airtight container in the refrigerator for up to one week.
**MY TAKES:**
- Seriously SO cool to experiment in the kitchen--I was SO surprised by the results.  One minute your mixture is mixing and the next, it's marshmallow creme!
- this makes A LOT, but that's okay--the leftovers are just yummy!
- if you want "stiffer" marshmallow creme beat longer.
- adding these two recipes together.  My tasters (my kids) said they like the marshmallow creme just on the top as a frosting.  So next time I will just be REAL generous with the "frosting".

Thanks for stopping by!

Saturday, August 16, 2014

scrapbook circle subscription and a FREE kit!

No comments:
Have you wanted to subscribe to a Scrapbooking online kit company, and not known which one to subscribe too?  I can tell you through my personal experience that Scrapbook Circle is one of the BEST out there--lots of BANG for your buck!

This month Lisa is offering a special (see all the details HERE).  What's AWESOME about Scrapbook Circle is that it is only a TWO month commitment and if you start with August you can get a FREE kit of your own choosing!
Island Paradise kit--August Scrapbook Circle kit.

Whatcha waiting for?! Sign up today! ;)

Friday, August 15, 2014

#relax.

5 comments:
The August Sketch challenge is up over on the Scrapbook Circle blog.  Here is a look at the sketch and my take on it:

closeup:
my favorites about this layout:

*the cut on the background, I love that it has the feel of water and circles, I've been wanting to use this cut for a LONG time!
*yes, behind the cut is the SAME background paper from the other day--what can I say?  I LOVED it! ;)
*the SO amazing clip from Chic Tags included in the Island Paradise kit.


There are TWO chances of winning a prize this month--so make sure you go to the BLOG for the details and GOOD luck!
Thanks for the visit!!

Wednesday, August 13, 2014

insta fun photos.

3 comments:
I wanted to share a real quick layout with you:
 I was challenged to use the Grand Bazaar Alphas featured in the Island Paradise kit from Scrapbook Circle--there are several different colors in the pack so you can mix and match.  Me, I'm a little OCD I like my letters to all match:
to make this title I also cut up the Heidi Swapp stickers included in the kit.

My favorites about this layout:
*LOVE the blue background paper--it's funky and just COOL!
* the cork piece is a Scrapbook Circle exclusive--AWESOME!
* I used scraps from another page to finish off this one.  (side note, one of my FAVORITE scrappers Jen Jockisch-currently on hiatus from scrapping, was a PRO at using snippits of leftovers)
*the picture of my son laying on the ground, funny because he really does like his picture taken!

Well, I'm off for a reading date with my youngest.  When I say reading I mean he reads his book and I read mine.  He's pretty excited because I am reading one of his FAVORITE books series (Michael Vey) and he is reading one of mine, (Harry Potter)! ;)

Thanks for the visit!

Monday, August 11, 2014

family.

4 comments:
Today I wanted to share another layout using the Island Paradise kit from Scrapbook Circle:
 little closeup of the popped up squares:

My favorites about this layout:
*I used busy paper as a background but it just GOES!
*love the mist!
* I wanted to use an instagram picture but didn't want to cut my page down to an 8 1/2 x 11 so I created a square within a square by cutting and embellishing 3 other squares.  Confused?! ;)
* the picture of course--such a FUN day in Old Town San Diego.  My kids look exceptionally tall because I am standing in a sort of indent in the sidewalk with flip flops on.
* the colors--bright and FUN!

Thanks SO much for the visit today-hope your day is FANTASTIC!!

Sunday, August 10, 2014

Pinterest Food Finds

1 comment:
I'm always looking to change my dinner up a bit.  I get BORED eating the same thing over and over again--don't you?  I also like to make recipes that aren't TOO difficult and that I either have the ingredients on hand or they aren't an arm and a leg to buy.  Here is one of those recipes I found on Pinterest:
Mexican Lasagna
Prep Time: 15 minutes
Cook Time: 1 hour
Total Time: 1 hour
Yield: About 6 servings
Ingredients
  • 1 lb boneless skinless chicken breast, cooked and shredded*
  • 1 cup sour cream
  • 1 1/3 cups salsa, divided
  • 1 (4 oz) can diced green chiles
  • 2 Tbsp chopped fresh cilantro
  • 1 1/2 tsp chili powder
  • 1/2 tsp paprika
  • 1/2 tsp ground cumin
  • 1/2 tsp onion powder
  • Salt and freshly ground black pepper, to taste
  • 8 (6-inch) corn tortillas, cut into quarters ***I used a layer of tortilla chips***
  • 1 cup fresh corn ***I used canned***
  • 1 Cup finely shredded Monterey Jack cheese 
  • 1 Cup finely shredded Cheddar cheese 
Directions
  • Preheat oven to 350 degrees. In a large mixing bowl blend together sour cream, 1 cup salsa, green chiles, cilantro, chili powder, paprika, cumin, onion powder, and season with salt and pepper to taste. Fold in shredded chicken. Spray an 11 by 7-inch baking dish with cooking spray and spread 1/3 cup salsa evenly in bottom of dish. Layer 15 tortilla quarters evenly over salsa, slightly overlapping each other (the flat cut sides of tortillas should be facing the rim of dish and rounded sides facing inward). Spread 1/2 of the chicken mixture evenly over tortilla layer the sprinkle 1/2 cup corn evenly over chicken mixture layer. Spread 1/2 cup Monterey Jack and 1/2 cup Cheddar evenly over corn layer, the repeat this process once more (tortillas (you'll have 2 quarters left over), chicken mixture, corn, cheeses. Tent with foil and bake in preheated oven 40 minutes, then remove foil and bake 20 minutes longer. Remove from oven and allow to rest 5 minutes then cut and serve with fresh tomatoes, avocados (or guacamole), additional sour cream, fresh cilantro, lime juice and hot sauce as desired.
  • **Don't use flour tortillas, corn is a must for this. Also look for some that are fairly stiff and sturdy, not delicate and flimsy.

  • MY TAKES:
  • I of course TWEEKED this a bit I used canned corn INSTEAD of fresh because well, that's what I had on hand!  And for the corn tortillas--I ran out of time to cook mine (I buy them where they are already made and you cook them up--YUMMY!), I just used tortilla chips and didn't use salt.
  • Thanks for visiting and HAPPY cooking!!

Saturday, August 9, 2014

howdy hey!

5 comments:
Hello to everyone who still visits me here on the blog!  This summer has been FULL of fun stuff, I have been creating fun creative items, and cooking items from Pinterest.  I really wanted to spend the summer just playing with the family.
Wednesday school started with mixed emotions I sent the kiddos to school:
I missed them like crazy, so I went to the gym then spent the whole day organizing stuff.  Truth be told my youngest got his iPod taken away and I hid it (months ago) and can't remember where I put it!  It's also a GREAT motivation for him to come and help me! ;0)

Yesterday I spent the day organizing my pages into chronological order in my books--yep I like how they look that way!  I think I had like 100 pages to put away...ugh, not a job I necessarily enjoy BUT I do like looking over my pages and seeing the creative process in each one!

Before I leave I wanted to share one of my pages for my last American Crafts gallery, I have been truly HONORED to be a part of their design team for these past 2 years, it's helped me to grow as a designer and work with some of my Scrapbook HEREOS--thanks AC:
My FAVORITES about this layout:
* I used one of my FAVORITE lines from American Crafts Plus One
* I am used a bunch of scraps! :)  I cut squares on most of these and reassembled in a random order...
* the memory from that day, it was unusually hot BUT the experience was SO fun!
* the layered embellishments
* the sewing--it's a bit hard to see but I quilted the WHOLE page.

Thanks SO much for the visit today!

Friday, August 1, 2014

Scrapbook Circle Blog Hop and PageMaps!

39 comments:
Welcome to our Scrapbook Circle Blog Hop! Scrapbook Circle has a new creative team, as well as a fabulous August kit, and we'd like to introduce you to both. You could win one of five August kits by commenting as you hop from blog to blog, meeting faces new and old to Scrapbook Circle.  

Okay, if you have just left Mona's blog, you are in the right place. If not, I hope you'll join us for the entire hop by starting at the Scrapbook Circle blog.

let me start off by introducing myself, my name is Diana Waite.  I have been blessed to be with Scrapbook Circle for close to 7 years, crazy how time flies!  I started out as an altered project design team member and worked myself into my currently role as a design team member who works with regular monthly kits.  I obviously LOVE it!  
I LOVE anything to do with Wonder Woman, my prized WW possession? A bobble head my dad bought me--she sits on my sewing machine and bobbles while I sew--makes me giggle! ;)
I'm a wife to my best friend of over 17 years and have three very active kids!  I spend A LOT of time at the soccer & Lacrosse fields, and track with my camera in tow--I LOVE it and wouldn't trade it for anything in the world.

I'm SO excited for you to come visit me on the Scrapbook Circle blog hop--welcome!  I was asked to work with this AWESOME PageMaps sketch:
This is how I was inspired using the Scrapbook Circle August kit, Island Paradise :
I wanted to spice up the background a bit so I cut the matted creme color paper just smaller than the 8 1/2 x 11 size.  Then I cut that piece into 4 different pieces and sewed them down and painted on them with watercolor paint and dropped mist on the background.  

For my sun I painted with yellow, orange and gold mist--it's quite sunny.  This particular cut is a Scrapbook Circle Exclusive and can be found in the shop HERE.
  (I used the negative piece of the cut covering up the work summer that was partially cut into it)

So if you haven't started hopping at the beginning of the hop here is the COMPLETE list to start from the beginning.  REMEMBER that the winners will be chosen RANDOMLY from among the comments left on ALL the blogs:

Sara 
Mona 
Diana W--this is me!
Lisa 

Hop ends Monday, August 4th at 9:00 p.m. Pacific--GOOD luck and thanks for hopping!